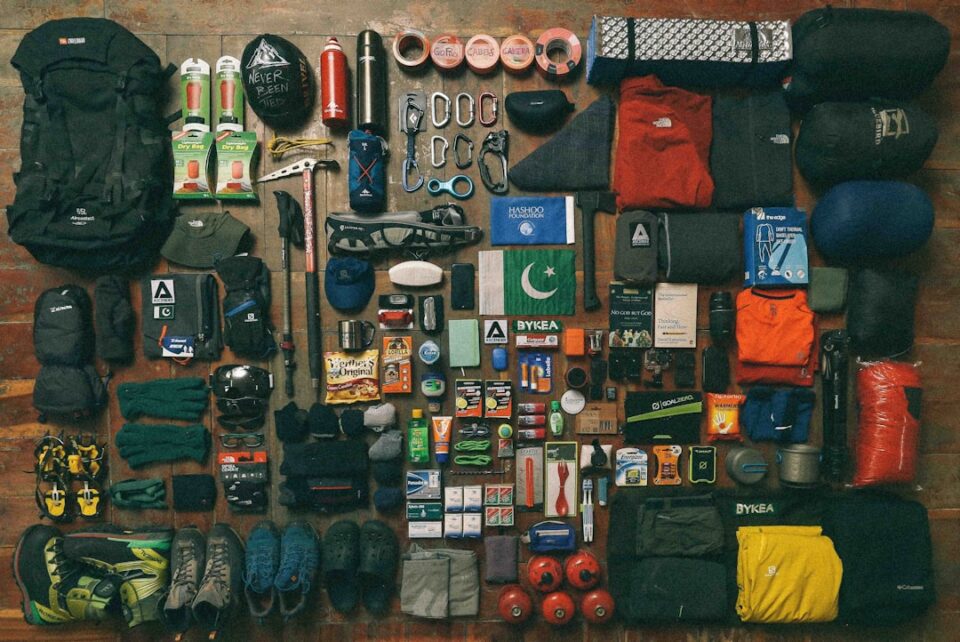
A good mountaineering backpack packing list does more than fill space. It helps you keep weight under control, match your gear to the route, and avoid the awkward moment of realizing the one item you need is buried at the bottom of the pack.
The best lists are not copied from a gear forum or memorized from a shop display. They are built around the actual trip. A summer scramble, a wet alpine approach, and a technical winter ascent all ask for different priorities. That is why this article focuses on how to think through the list, not just what to write down.
If you want more gear planning ideas later, you can browse the rest of the mountaineering and camping guides on Sportstro and compare notes with your own system.
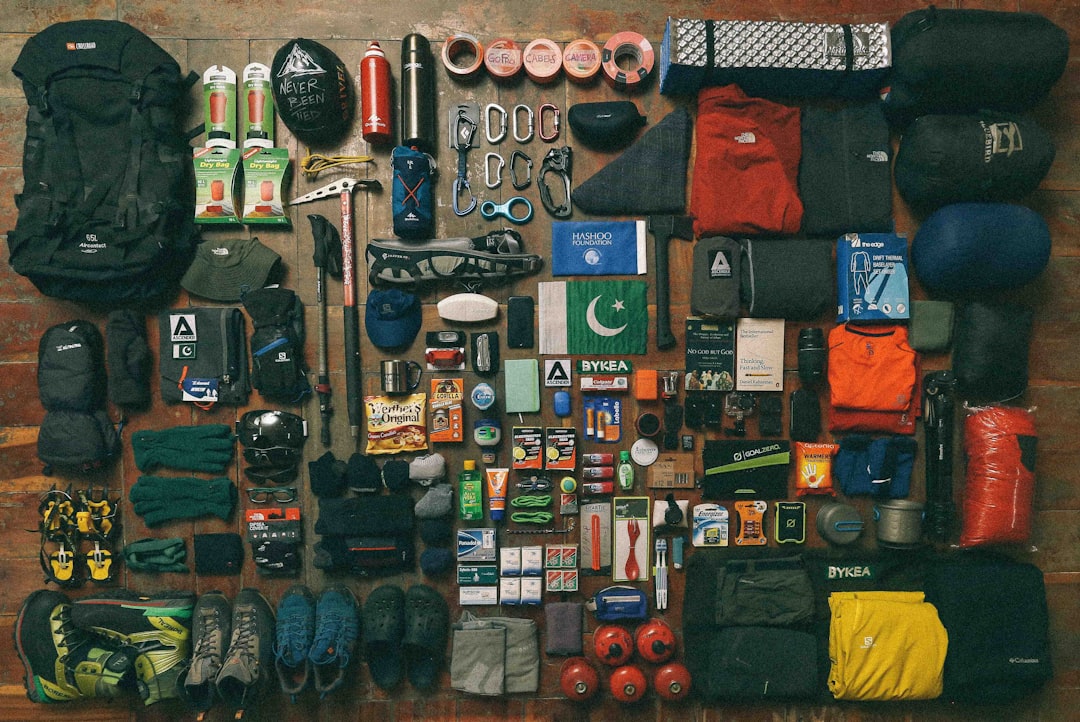
Build a mountaineering backpack packing list around the route
The fastest way to overpack is to start with objects instead of conditions. I like to begin with four questions. How long is the trip. What season am I going in. How much time will I spend above the treeline. What kind of terrain am I dealing with. Once I answer those, the list becomes much easier to shape.
A one-day ridge route with a short approach might only need compact shelter, a small food reserve, light insulation, and simple navigation tools. A two-day alpine loop with mixed weather calls for more clothing, more water capacity, and a better system for drying or protecting damp items. A technical climb adds rope, hardware, and a different attitude toward redundancy.
That is the point many people miss. A mountaineering backpack packing list is not a shopping list. It is a route plan in gear form. If the route is faster than expected, some items stay packed. If the weather turns, some items move from optional to essential. The list should help you decide which gear earns its place before you ever zip the pack shut.
My own habit is to split the list into three columns in my head. Things I absolutely need. Things that depend on the route. Things that are convenient but can stay home. This simple filter keeps the pack honest. It also makes it easier to adjust when a partner already carries shared gear or when a guide has different group equipment in the plan.
The more serious the route, the more I value restraint. Extra gadgets rarely save a bad plan. A clean list, on the other hand, can make a difficult day feel organized before the first step.
The big three: shelter, sleep, and water
If the route involves an overnight stay, the big three deserve the first look. Shelter, sleep, and water are the categories that shape both pack weight and comfort. They are also the items people most often underestimate, because each one seems small until it becomes the reason you are cold, tired, or slow.
Shelter starts with the actual conditions. In dry alpine weather, a compact tent or tarp may be enough. In mixed mountain weather, I prefer something that can handle wind and fast-changing rain. A bivy, a minimalist tent, or a shared shelter all make sense in different settings. The right choice depends on how exposed the route is and how much time you expect to spend above tree cover.
Sleep gear is where honesty matters. People often choose a sleeping bag by optimism instead of temperature. I think that is a mistake. A bag or quilt should match the coldest realistic night, not the warmest memory of a summer weekend. Pad choice matters too. A thin pad may save space, but if the ground is cold or uneven, poor sleep will cost more energy than the pad ever saved in ounces.
Water planning needs the same discipline. On short routes, a bottle and a filter bottle may be enough. On long, dry, or high-exposure routes, the situation changes quickly. I like to ask where the next water source is, whether it is reliable late in the season, and whether I can drink there or must carry more from the start. A water treatment option, a backup bottle, and a way to store enough fluid for the next leg all deserve attention.
A simple packing order helps here. Shelter items can live lower in the pack, sleep gear in a dry sack, and water access where I can reach it without unpacking everything. That keeps the system calm when conditions get messy.
Clothing layers that actually earn their space
Clothing is where mountaineers quietly lose the war on pack weight. It is easy to imagine every possible weather swing and pack for all of them. The better move is to build layers that work together and then add only what the route honestly needs.
I usually think in terms of a moisture layer, a warmth layer, and a shell layer. The moisture layer manages sweat and dries quickly. The warmth layer traps heat when the wind picks up or the pace slows. The shell blocks rain, snow, and spindrift. Around those core pieces, I add socks, gloves, a hat, and maybe a spare insulating piece if the forecast is uncertain.
One of the most useful habits is to pack clothing by function rather than by outfit. That means I do not ask whether I have enough clothes. I ask whether I have a way to stay dry, a way to stay warm, and a way to move without overheating. A spare base layer may matter more than a second heavy fleece. A light rain shell may matter more than a thick jacket if the climb is steep and the weather is variable.
Gloves deserve more respect than they usually get. One pair for movement, one pair for wet weather, and one warmer pair for rest or emergency use can make a big difference. The same goes for headwear. A thin cap under a helmet, a warm beanie for breaks, and maybe a face covering for wind can all be useful without turning the pack into a closet.
The mistake I see most often is bringing too many interchangeable layers. Two midlayers that do the same job are not protection. They are just extra weight. A better list is specific. Each piece should answer a question the mountain might ask.
When I pack this section, I lay everything out and ask one blunt question. If the weather changes twice today, which pieces keep me functional. The answer is usually fewer items than I first expected, but each one works harder.
Food and cooking gear for cold days
Food on mountain trips is not only about calories. It is about speed, morale, and the ability to keep making decisions when the weather gets irritating. I like to plan meals the same way I plan layers. What does the route demand, and what can I carry without making the pack awkward?
For a short day outing, snacks may be enough if the climb is not too long and the approach is straightforward. For longer days, I prefer easy food that does not require too much handling. Bars, dried fruit, nuts, wraps, cheese, jerky, and simple sandwiches all work because they are easy to eat in bad weather. If the temperature is cold, I also pay attention to food that stays edible when everything is frozen stiff.
Cooking gear should match the trip rather than your fantasy of a perfect camp meal. A small stove, a pot, a spoon, a lighter, and fuel may be enough. If the route is exposed to wind, I care more about stability and efficiency than about cook time in a kitchen test. On a group trip, it may make sense to share a stove and split fuel. On a solo trip, simplicity usually wins.
There is also a difference between cooking and warming. Some trips deserve a proper hot meal at camp. Others only need the ability to melt snow or heat water. That choice changes everything. When I know I will not cook much, I pack less fuel and fewer accessories. When I know I will be out for a second night, I add a little margin because the price of running out is annoying at best and risky at worst.
Bear canisters, odor-proof storage, and food hanging systems are route-dependent, but they are never afterthoughts. If the area requires them, they belong on the list early. If not, they do not need to take up space just because they look responsible.
My rule is simple. Food should be easy to reach, easy to eat, and easy to count. If I cannot explain the meal plan in ten seconds, the plan is probably too complicated.
Navigation, light, and the gear that keeps you oriented
Navigation and light are the quiet essentials. Nobody posts glamorous photos of a map and a headlamp, but on the wrong day they matter more than a flashy jacket ever will. This is where a careful mountaineering backpack packing list starts to feel mature.
I like to keep navigation tools in layers. A physical map and compass stay in the pack no matter how good the phone battery looks at the trailhead. A phone or GPS device can help, but it should not be the only plan. Screens fail when batteries drop, when gloves get wet, or when the weather turns too cold for a full day of use. A paper backup still makes sense because it never asks for signal.
Light follows the same logic. A headlamp is standard, but spare batteries or a rechargeable power bank can decide whether the descent feels calm or awkward. I also like a tiny emergency light source as a backup when the route is long. It is one of those items that feels unnecessary until it suddenly feels clever.
Emergency gear does not need to be huge to be useful. A whistle, a compact repair kit, a small knife or multitool, adhesive tape, a few zip ties, and a basic first aid pouch can solve a lot of small problems before they become trip-ending. The point is not to turn the pack into a medical bag. The point is to carry enough to handle the common failures that mountain travel throws at people.
I also keep a habit of making navigation easy to access. If I have to unpack half my gear to check the route, I am less likely to do it often enough. A map in the lid, a compass in a pocket, and the phone in a place I can reach without drama all help me stay honest about where I am.
This section is also where routine matters. Before I leave, I check battery levels, download maps, confirm the route line, and make sure the headlamp actually turns on. It is dull work. It also saves a lot of stress.
Packing for rope, ice, and steeper terrain
Once the terrain gets steeper or more technical, the list changes fast. This is where a casual hiking load stops being enough. Rope, protection, traction tools, and helmet gear can turn a light mountain pack into a serious alpine system.
Not every route needs every piece. That sounds obvious, but it is worth saying because beginners often pack technical gear just in case, then struggle under the weight. I prefer to build the list from route requirements. If the climb includes snow fields, steep firm slopes, or exposed sections, I decide whether crampons, an ice axe, a helmet, or a harness is actually required. If the route includes rope travel, I plan the rope, belay device, carabiners, slings, and anything else the system demands.
For rope days, the important part is not just carrying the equipment. It is knowing who carries what and how the group intends to use it. A rope stuffed into a pack with no plan is just extra mass. A properly assigned rope, with the correct length and the correct hardware, is part of the route strategy.
Traction tools need similar attention. Crampons should fit the boots you are actually wearing. An ice axe should match the terrain and your skill level. Helmet fit matters because a helmet that rides poorly often ends up living on the pack instead of the head. Gloves need to allow dexterity if you will handle metal on cold rock or snow.
One thing I try to avoid is packing technical gear without practicing with it first. If the route is going to demand quick changes, I want that system familiar before I am breathing hard on a slope. That means pre-trip checks, ground practice, and a clear understanding of where each item lives inside the pack.
Technical gear should never feel mysterious on the mountain. If it does, the list was written too late.
Group gear versus personal gear
One of the smartest ways to reduce pack weight is to stop pretending every item has to be duplicated. On any team trip, some items should be shared. Others should stay personal. Knowing the difference saves weight and also makes the group more efficient.
Shared gear usually includes the shelter system, cooking system, rope on technical routes, certain safety items, and larger repair materials. Personal gear usually includes clothing, food, water capacity, sleep items, foot care, and the specific items each person needs for comfort and function. The exact split depends on the team size and the style of the trip, but the logic is stable.
I like to assign group gear by weight and by responsibility. If one person carries the stove, another can take extra fuel. If one person carries the tent body, another can carry stakes or poles. If one person carries the rope, another can carry the protection kit. The goal is not perfect equality. The goal is a fair and workable balance.
There is another reason this matters. When people share a list, they often assume someone else packed the important item. That is how stove fuel, a repair sleeve, or a first aid pouch gets forgotten. A written split with names next to items keeps the system clean.
For newer teams, I recommend a quick check before leaving the parking lot. Each person says what they have and what they are responsible for. It takes two minutes and can save a long argument later. The same habit works well for guide trips, club outings, and casual alpine partners who know each other well but still benefit from a checklist.
A good group system also makes room for different strengths. Stronger carriers can take the heavier shared items. Faster climbers can take lighter technical kit. The best teams do not just divide gear. They divide the work in a way that matches the route.
How to organize the pack so it works on the move
The best gear list still fails if the pack is chaotic. Organization is the difference between a useful pack and a black hole. When I organize a mountain pack, I think about access first, then balance, then protection from moisture.
Heavy items belong close to the spine and near the middle of the pack. That keeps the load stable and less tiring over a long day. Bulky but lighter items can live lower down. Frequently used gear belongs where I can reach it without unpacking the whole bag. Rain shell, snacks, map, compass, gloves, and headlamp usually deserve that kind of access.
Dry bags or stuff sacks help, but they work best when I do not overcomplicate them. One sack for sleep gear. One for clothing. One for food. One for technical hardware if the route needs it. Too many little bags turn the pack into a puzzle. Too few make it harder to find what I need fast. The middle ground is usually best.
I also like a simple packing order. Bottom layer for sleep or camp gear. Middle layer for dense items and food. Top layer for shell, warm hat, gloves, and daily access items. Side pockets for water bottles or items I may need on the move. Lid pocket for small things that disappear easily if left loose.
Another detail that matters is moisture management. Wet gear should not sit against dry insulation if I can avoid it. If I expect rain, I put the shell where I can grab it fast and I protect the sleep system inside its own dry layer. In wet mountain weather, that small discipline saves a lot of frustration at camp.
When the pack is organized well, I waste less time digging, lose fewer items, and make better decisions. It sounds minor. On a long route, it changes the whole day.
Seasonal and route-based adjustments that save weight
No single packing list works for every season. A summer alpine day, a shoulder-season overnight, and a winter ascent all ask for different choices. The trick is not to own everything. The trick is to know what changes and why.
In summer, I usually focus on sun protection, light insulation, enough water capacity, and a rain layer that is easy to pull on quickly. In shoulder season, the weather is less forgiving, so I pay more attention to warmth, dry storage, and backup options if the route slows down. In winter, the list becomes much more serious. Cold management, traction, insulation, fuel, and careful packing order matter much more.
Terrain changes the list too. A rocky ridge may not need the same protection that a snow slope requires. A glacier route changes the entire equipment conversation. A brushy approach may call for tougher outer layers and better glove planning. A humid mountain environment can make drying and moisture control more important than in a dry alpine zone.
I also adjust based on pace. Fast-and-light attempts leave less room for extras, which means each item needs to justify itself. Slower trips can carry a little more comfort or redundancy, but only if the team accepts the weight tradeoff. The point is to keep the list honest about the style of travel, not just the distance.
One useful habit is to keep three versions of the same list. One for warm seasons. One for mixed weather. One for technical or winter travel. That way I am not reinventing the system every time I plan a trip. I just edit the version that fits the forecast.
If you want a simple test, ask whether the list still makes sense if the temperature drops, the wind rises, or the approach takes longer than planned. If the answer is yes, you are close.
Final checks, maintenance, and the habit of rebuilding the list
A strong mountaineering backpack packing list is never finished forever. It should evolve every time you use it. That is what makes it valuable. The best lists remember what worked, what stayed unused, and what was missing when conditions shifted.
My final check starts the night before. I lay out every item, compare it against the route, and ask whether anything is there only because I am nervous. Then I look for the real misses. Did I pack enough food. Is the water plan realistic. Did I confirm the weather. Are the batteries charged. Is the route loaded. Are the group gear assignments clear. That short review catches more mistakes than a long, rushed morning ever will.
After the trip, I do something just as useful. I put the pack aside and clean the list while the details are still fresh. Which items stayed untouched. Which piece became more valuable than expected. Which item I wished I had carried. That review makes the next trip better without much effort.
Gear maintenance belongs here too. Dry the shelter fully. Air out the sleep system. Clean mud from boots and hardware. Check straps, buckles, and zippers. Restock first aid items. Replace batteries if needed. Repack technical items so they are ready for the next outing instead of becoming a pile of forgotten parts in the garage.
If you keep a master list, treat it like a living document. Trim from it. Add to it. Rewrite it for season, route, and team size. That is how a personal system becomes reliable. Not by being perfect on day one, but by getting a little sharper after each trip.
In the mountains, small details carry real weight. A good list keeps those details from becoming surprises.