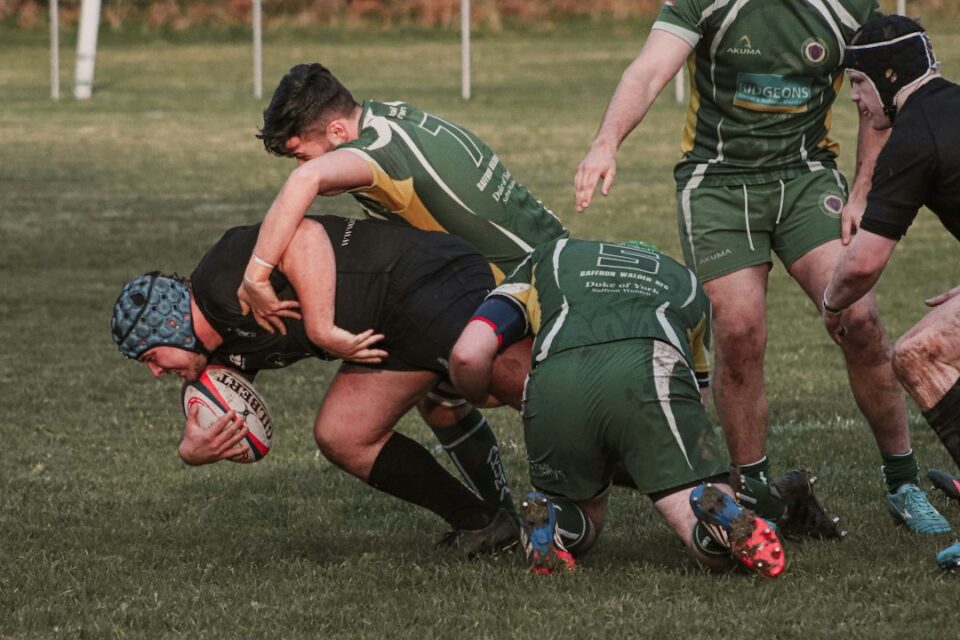
A strong Rugby program does not happen by accident. It is built month by month, week by week, using clear objectives, an age-appropriate pathway, consistent coaching language, and routines that protect player welfare while raising standards. This guide lays out a complete, practical 12-month Rugby program for clubs and schools you can adopt and adapt straight away. Whether you are starting from scratch or refining a mature setup, you will find a blueprint that turns intentions into a calendar, a calendar into sessions, and sessions into repeatable progress.
Rugby program objectives that guide every decision
Before drawing a single drill, decide what success looks like. Objectives focus effort, keep staff aligned, and make it obvious what to say yes or no to across a long season. Use a short list that covers player growth, team performance, and experience quality. Each objective needs a metric and a routine that makes it visible during the year.
Examples of clear, balanced objectives:
- Participation and retention: retain 85 percent of registered players year to year and ensure at least 90 percent weekly attendance across age grades.
- Skill growth: demonstrate measurable improvement in core catch-pass, tackle technique, breakdown entry, and kicking benchmarks at least once per term via simple tests.
- Game understanding: lift game-shape literacy (spacing, depth, width, and decision speed) through scenario games recorded and reviewed once per month.
- Player welfare: implement consistent return-to-play steps after any suspected head knocks in line with your union’s guidance, and track training load so high-risk spikes are avoided.
- Coach development: every coach completes two peer observations per term and one external workshop per season, sharing one key learning with the group.
Translate objectives into operating principles the whole group can recall:
- Simple beats complicated: fewer calls, repeatable shapes, and adaptable constraints.
- Ball in play: prefer game-based activities with high ball-touch counts and clear scoring conditions.
- Shared language: one club vocabulary for tackle height cues, breakdown entry, and contact footwork.
- Progress over perfection: small weekly nudges tracked on a plain scoreboard everyone can see.
Write objectives and principles on a one-page charter, revisit them at the start of each phase (pre-season, in-season, post-season), and use them to make scheduling decisions when the calendar gets tight.
The 12‑month calendar and season phases
A practical calendar has three big cycles: pre-season, in-season, and post-season, with transitional breaks to recharge. Map the whole year first, then zoom into months, then weeks. The aim is to pace growth, not to cram. A sample structure looks like this:
- Post-season (4 weeks): debriefs, fun mixed-format games, light skill refresh, exit interviews, equipment audit, and coach reflection. Minimal structure so players decompress while staying connected.
- Off-season (6–8 weeks): optional athletic development sessions (speed, coordination, and robustness), multi-sport play, and technical “micro-habits” (10-minute touch passing or kicking twice a week). No grind; the goal is freshness and variety.
- Pre-season (8–10 weeks): build capacity and clarity. Weeks 1–3: movement, skill foundations, and unit basics. Weeks 4–6: game model and set-piece. Weeks 7–8+: scenario training, special teams, and rehearsed game-week routines.
- In-season (14–20 weeks): a weekly microcycle with recovery, skill sharpening, game prep, and review. Protect freshness near exam blocks or tournament clusters by trimming volume and prioritizing tactical clarity.
Set key milestones: fitness screening and skill benchmarks early in pre-season; a first internal trial after Week 4; a mid-season review around the halfway mark; and an end-of-season festival or finals block. Backwards-plan from your first competitive match. If you have six weeks, decide what must be in place by Week 6 and scale each week accordingly.
Practical calendar tips:
- Publish the whole-year view for players and parents with dates for registration, kit issue, photo day, tour windows, and exam breaks.
- Lock in “non-negotiable” club events early (coach education nights, community days, fundraising) so sessions are not squeezed.
- Add buffer weeks where weather or field access is unpredictable.
- Color-code the weekly load (green = light, amber = moderate, red = heavy) so staff instantly see the rhythm.
Age‑grade pathways and progression standards
One reason clubs struggle is teaching the same things in every group while hoping players emerge “ready.” The pathway should stage-load the right challenges at the right time, with clear graduation signals. Keep it simple, consistent, and visible to families as well as coaches.
A sample pathway:
- Mini (U6–U8): joy and coordination. Emphasize movement patterns (balance, stop-start, side step), safe falling, spatial awareness, and play with lots of ball touches. Rules are simplified, tackling introduced via safe shapes only when appropriate to local rules and readiness.
- Junior (U9–U12): add contact fundamentals (head position, shoulder contact, wrap, leg drive, and footwork), two-player breakdown positioning with low body height, and simple game shapes (two-sided attack, pass before contact when space is on). Kicking for exploration, not territory obsession.
- Youth (U13–U16): consolidate tackle and breakdown skills under pressure, introduce unit roles (front-row, locks, loose forwards, halfbacks, midfield, back three), expand kicking options (exit kicks, contestables), and basic lineout and scrum mechanics aligned with union guidance for age and safety.
- Senior school/club: position-specific depth, advanced set-piece, phase-to-phase decision rules, and scenario prep (closing out a match, chasing a game, managing cards). Leadership and communication become explicit roles.
Define simple graduation standards so coaches can say, “You are ready for the next challenge” with evidence:
- Movement screen: a player can accelerate, decelerate, and change direction safely with control on both sides.
- Contact technique: consistent safe body shapes in tackle and at the breakdown during live play.
- Game understanding: demonstrates width, depth, and support lines in small-sided games without constant prompting.
- Mindset: keeps effort and attention high, communicates calmly, and responds to feedback.
Post your pathway on a wall in the clubhouse. Use the same icons and phrases across all age groups. When players move up, host an orientation session to align expectations and language so the experience feels continuous, not confusing.
Coaching structure and session design
Good plans falter without clear roles. A simple, scalable coaching structure keeps communication crisp and sessions efficient:
- Head Coach: sets game model, coordinates calendar, leads selection standards, and runs whole-group messaging.
- Unit Leads: forwards and backs coaches own set-piece, contact skill priorities, and unit reviews.
- Assistant Coaches: run stations, manage equipment and timing, and lead small groups.
- Manager/Operations: handles registrations, uniforms, travel, communications, and match-day logistics.
- Player Leadership Group: captains and seniors support standards, hold short huddles, and model communication.
Session design rules of thumb:
- 90 minutes is plenty for most teams; 75 minutes for juniors. Aim for 60–70 percent ball-in-play with minimal lecturing.
- Move from simple to complex: warm-up priming, skill grooving, game-based application, then unit/tactical pieces.
- Use constraints instead of long speeches. For example, “score only in the five-meter channel” or “three passes before contact” to shape decisions.
- Plan two priorities per session. If everything matters, nothing sticks.
- Finish with a short debrief: what worked, what needs attention next time, and one cue to remember.
Keep the session plan on a clipboard with timings, equipment list, station diagrams, and coaching cues. Share the plan the day before with assistants so everyone arrives aligned. Build a library of 10–12 favorite games and constraints you reuse; depth comes from repetition with small variations, not from endless new drills.
Technical skill curriculum by unit and position
The curriculum is your backbone. It organizes what to teach and when to revisit it so the squad grows layer by layer. Group skills into core (all players), unit (forwards/backs), and positional details.
Core skills (all players):
- Catch-pass under pressure: hands to target, early catch, footwork to square, pass length on both sides, and support line habits.
- Contact footwork and tackle: step into and out of contact safely, shoulder and wrap with head in a safe position, roll to reload, and get back on feet quickly.
- Breakdown entry: low hips, long levers, strong back, clear-out angles, and decision between contest, latch-support, or fold.
- Kicking fundamentals: drop punt or spiral basics, contestable hang-time punts, and kick-chase roles.
- Spatial awareness: width and depth, two-sided attack, and recognizing mismatch triggers.
Unit skills:
- Forwards: scrum body shapes, safe binding, and pressure application; lineout roles (caller, jumper, lifters) with simple calls; maul entry and exit; close-quarter carry and clean.
- Backs: set-up shapes (2–4–2 or 1–3–3–1 variants), first receiver options, strike moves built from the same family of cues, and back-field coverage and contestable kick chase.
Positional details (examples):
- 9: pass quality and tempo, box-kick craft, and defensive sweep.
- 10: scanning, depth control, and kicking to grass; communicate simple pictures early.
- 12/13: square hips and timing on crash vs tip vs pull, and defensive spacing.
- 15: aerial skills, back-field communication, and counterattack cues.
- Props/hookers: core strength shapes, set-up, strike timing, and throw rhythm.
Structure your season so each topic appears in pre-season, revisits in early season, and returns near mid-season under higher pressure. Use simple rubrics (1–5) for key skills so players see progress and coaches see where to focus next.
Strength, speed, and conditioning planning
Physical preparation supports performance and reduces the chance of overload. It does not need fancy equipment to be effective; it does need consistency and smart sequencing. Integrate speed and robustness into rugby sessions where possible to save time and maintain engagement.
Principles:
- Micro-dose speed year-round. Two short exposures per week (acceleration one day, max velocity another) keep qualities ticking without fatigue.
- Own the warm-up: sprint mechanics, landing practice, and change-of-direction shapes appear in the first 15 minutes.
- Use simple strength categories: push, pull, hinge, squat, carry, and trunk. Progress through ranges and tempos before chasing load.
- Condition with the ball when practical: small-sided games with work:rest ratios that match the target energy system, plus occasional off-feet conditioning during heavy match clusters.
Sample weekly physical microcycle (in-season):
- Mon: recovery, mobility, light skill touch, and optional gym (pulls, hinge, trunk).
- Tue: acceleration buildups, contact skill grooving, unit work, conditioning via small-sided games.
- Thu: max-velocity strides, tactical rehearsal, set-piece polishing, optional gym (push, squat, carry).
- Sat: match day.
- Sun: off or walk/stretch as needed.
Track perceived exertion after sessions and compare to planned load color codes. If players report higher strain than expected, cut volume or simplify the next session. A small adjustment now protects freshness later, especially during exam weeks or tournament travel.
Player welfare, safety, and load management
Player welfare sits above tactics. Good routines protect freshness and confidence while preserving the joy of rugby. Build clear, calm steps for issues such as suspected head knocks, soft-tissue soreness, heat stress, and illness. Follow your union’s protocols and your school or club policy, and ensure all coaches know the steps.
Practical routines:
- Designate a match-day first responder and keep a stocked kit: gloves, ice, bandaging, a simple airway checklist, water, and emergency contacts.
- Log any suspected head knocks and follow the recommended return-to-school and return-to-play steps, communicating with families and staff.
- Use simple daily readiness checks during intense blocks: sleep quality, soreness rating, mood. If two or more flag high, simplify the player’s session.
- Control contact volume. Use pad work, walk-throughs, and technical drills to limit heavy live-contact reps while still improving technique.
- Hydration and heat: have shade and water breaks planned, lighten kit and reduce session density on hot days.
Create a safety culture by modeling calm language, never shaming players for reporting symptoms, and celebrating smart decisions. Publish your welfare steps on a visible board so players and parents trust the process.
Data, testing, and video workflows
Data supports decisions when it is simple and consistent. Aim for “paper and pencil good” rather than complex dashboards that nobody checks. Decide which numbers actually influence your plans and collect only those. A little discipline goes a long way.
Useful, low-friction metrics:
- Attendance and availability: who trained, who was modified, and who missed. Availability is the first performance stat.
- Skill benchmarks: a two-minute catch-pass test, a tackle technique checklist scored 1–5, and a kicking accuracy grid. Repeat once per term.
- Physical markers: 10-meter and flying 20-meter times, a broad jump or hop test, and a simple isometric hold metric (e.g., front plank time) to track trunk capacity.
- Game data: line breaks, line breaks conceded, dominant collisions, penalty count, set-piece wins, and red-zone conversion rate. Keep a volunteer stat crew to tally.
Video workflow:
- Film from a high, wide angle when possible. One parent or student videographer per match is enough.
- Tag just a few moments that link to your current theme (e.g., tackle height or exit strategy).
- Share a three-clip playlist after each game with one strength, one fix, one highlight. Ten minutes is plenty.
- Use video for coaches too. Film part of a session and review cues and organization in your staff huddle.
Keep all files in a shared drive with a clear folder structure by year, team, and round. Simple beats perfect if you keep doing it.
Culture, leadership, and communication routines
High-functioning teams run on everyday habits, not slogans. Culture becomes visible in the way players arrive, prepare, and speak to each other under pressure. Embed small routines and the tone will follow.
Routines that work:
- Time windows: arrive 15 minutes early, boots on by five minutes to start, setup completed by the player leadership group.
- Role cards: each player knows their three focus jobs on attack and defense and can state them quickly.
- Voice rules: short cues, one message at a time, questions first to unlock player thinking before coaches add detail.
- Leadership reps: different players lead parts of the warm-up, a skill station, or the final team talk each week.
- Shared standards: tidy kit, clean sheds, and a quick “leave it better than we found it” sweep after training and matches.
Conflict is normal. Normalize feedback by using a simple, calm format: “I saw X, it affected Y, next time let’s try Z.” Keep a weekly five-minute leadership huddle with captains and coaches to surface small issues before they harden.
Budgeting, equipment, and facility checklists
Operations shape the player experience as surely as tactics. Build a simple budget and a set of checklists so you buy once, maintain what you own, and avoid last-minute stress.
Budget lines to plan:
- Coaching development: workshops, certifications, and travel.
- Equipment: balls, cones, hit shields, tackle bags, ladders, scrum machine maintenance, GPS or timing gates if used, and video tripod.
- Kit: uniforms, socks, mouthguards, and laundry supplies.
- Facilities: field rental, lights, changing room supplies, water access, and first-aid consumables.
- Travel and events: bus hire, tournament fees, community days, and post-match functions.
Equipment and facilities checklist:
- Ball inventory by size and condition; pump and spare valves; label everything by team.
- Marking kit: cones, poles, flat discs, and quick try-line markers.
- Contact gear: regularly inspect stitching and foam, rotate use, and clean weekly.
- Storage: lockable shed or cage, clear shelves, and a sign-out sheet.
- Field setup: portable post pads, corner flags, and rope or pads for spectator boundaries.
Post the budget and checklists where volunteers can help. When new helpers ask “What can I do?” hand them a page and empower them to own it.
Community, parents, and game‑day operations
Strong programs connect beyond the white lines. Parents, teachers, alumni, and local clubs become allies when you show clear plans and welcome practical help. Set expectations early and provide small jobs that matter.
Useful community practices:
- Start-of-season forum: share the calendar, welfare routines, contact points, and how selection works. Invite questions.
- Volunteer roles: assign scoreboard, water, filming, and stats collection. Rotate so more people participate.
- Communication rhythm: one weekly email or message with the plan for training and matches, punctual updates for any changes.
- Celebration: short, consistent recognition after matches (player of the day, best teammate, best effort) and a termly community barbecue or breakfast.
- Pathway links: invite senior players to run junior sessions, and visit local primaries with a fun, safe rugby taster.
Game-day checklist:
- Field setup done 45 minutes before kick-off: flags, pads, rope, technical zone, and water stations.
- Kit and equipment verified: jerseys in size order, ball bag labeled, pump, spare tee, and first-aid kit.
- Roles assigned: match-day manager, water runners, videographer, and statistician.
- Warm-up time-boxed: activation, set-piece rhythm, and one or two scenario run-throughs. Save legs and minds.
- Post-match: short debrief, thank the officials and opposition, tidy the sheds, and share a community moment.
Keep parents in the loop with a simple live update if travel or weather intervenes. Consistency builds trust.
Measuring progress and continuous improvement
Great programs evolve. Build short feedback loops so you adjust quickly, not just at season’s end. Keep the loop light and frequent: observe, capture, discuss, act.
Weekly loop:
- Monday: scan availability, check soreness notes, and confirm the microcycle color code.
- Tuesday: collect perceived exertion and any tweaks; record one coach observation to share at the end of practice.
- Thursday: choose next week’s session priorities based on what you saw and what the schedule demands.
- Saturday: film and tag three clips aligned to your theme; win or lose, share the playlist with a short note.
Monthly loop:
- Run skill benchmarks and update the simple 1–5 rubrics.
- Hold a 20-minute coach huddle to review what the numbers and clips say and agree the next focus.
- Invite player voice: one anonymous question each about clarity, enjoyment, and challenge. Track trends.
Term/end-of-phase loop:
- Hold a structured debrief: what was on plan, off plan, and unclear.
- Reset objectives if needed. If retention or attendance dips, invest in fun, short-sided play for a block. If skill growth stalls, shrink the theme count.
- Share a brief season story with your community so they see the plan and the progress.
Continuous improvement is easier when you keep a single source of truth. A shared folder with the calendar, session plans, scoreboards, and videos reduces confusion and shortens the distance between idea and action.
Putting it all together: a sample week
Here is an example in-season microcycle for a senior school or community club. Adapt durations to your context and field access.
- Monday (45–60 min): walk-through review, mobility and light games (touch variants), contact technique reset (low rep quality), and a captains’ huddle to set two focus points.
- Tuesday (90 min): acceleration strides, catch-pass pressure game, breakdown decision game with constraints, unit blocks (scrum and lineout), and conditioning through a conditioned game (e.g., five-phase score challenge).
- Thursday (75–90 min): max-velocity buildups, tactical rehearsal (set plays, exit plan, restart responsibilities), and special teams like goal-kicking routines and contestable kick chase. End with a short scenario game (defend a lead, chase a try).
- Saturday: match day with a 25–30 minute warm-up and a short, calm debrief after.
Across the week, protect freshness by trimming contact volume when needed, and keep cues short: one idea per message, one task per player per phase. Simplicity helps decisions hold up under pressure.
Common pitfalls and what to do instead
Even well-intentioned programs run into predictable traps. Here is how to sidestep them:
- Trap: too many themes in one session. Do this instead: pick two and hit them hard in different activities; repeat next week if needed.
- Trap: chasing fancy drills. Do this instead: build a small library of favorite games and tweak constraints to keep them fresh.
- Trap: overloading contact work. Do this instead: use technical pads and walk-throughs for shapes; keep live contact purposeful and limited.
- Trap: long post-game meetings. Do this instead: share a three-clip playlist and one theme for the week; let players reset.
- Trap: poor communication with families. Do this instead: send one weekly plan message and maintain a simple page with welfare steps and contacts.
Build your plan on one page, share it early, and keep checking reality against intentions. If you want a compact checklist version of this guide and more templates, browse the resources on Sportstro and adapt them to your context.
With objectives, a visible calendar, a coherent curriculum, and calm routines, your Rugby program will feel organized, safe, and enjoyable. The outcome is not just wins but players who love coming back, coaches who know where they are going, and a community that sees the plan and wants to be part of it.